Want a fast, reliable way to add Google login to your Supabase app with Lovable? Here’s the complete, practical flow from the initial “unsupported provider” error to a fully working OAuth sign-in. You’ll enable the Google provider in Supabase, configure Google Cloud credentials, fix redirect URLs, and test the full flow using your preview link.
Why enable Google in Supabase before testing social login?
Before anything else, the Google provider must be enabled in Supabase. That “unsupported provider” message means the provider is not active yet. You’ll turn it on and prepare the fields required for OAuth.
Where do you enable the Google provider in Supabase?
- Go to Supabase: Authentication → Sign-in and providers.
- Find Google and enable it.
- Note the required fields: Client ID and Client Secret.
What credentials do you need and why?
- You need a Google OAuth Client ID and Client Secret to authenticate users.
- These are created in Google Cloud, then pasted into Supabase.
- Without them, Supabase cannot complete the Google sign-in flow.
Key vocabulary (with examples):
- unsupported provider: error when the provider isn’t enabled. Example: “provider is not enabled.”
- Sign-in and providers: Supabase section to enable Google. Example: “enable sign in with Google.”
- Client ID / Client Secret: credentials from Google Cloud used by Supabase.
How to configure Google Cloud OAuth for Supabase?
In Google Cloud, you’ll set the OAuth consent screen, authorize domains, and create a web client with correct origins and redirect URIs. Small details like removing the trailing slash matter.
How to set the OAuth consent screen and authorized domains?
- Open Google Cloud Console → API & Services → OAuth consent screen.
- Add app name (e.g., Photo Renaming app) and optional logo.
- Add Authorized Domains: use your Lovable preview link domain. Remove https and any trailing slash.
- For safety, also add the Supabase callback URL domain.
- User type choice: internal (only your domain) or external (public; requires verification). For testing, internal is fine.
Useful concepts:
- Authorized Domains: domains allowed to use OAuth. Example: add your Lovable preview domain.
- preview link: the live Lovable URL to use for testing, not the in-editor preview.
- branding: name and logo shown during Google sign-in.
How to create the OAuth client with redirect URIs?
- In Credentials, create a new Client: application type = Web application.
- Authorized JavaScript origins: add the root Lovable preview domain. No trailing slash.
- Authorized redirect URIs: paste the Supabase callback URL. No trailing slash.
- Create, then copy the Client ID and Client Secret to Supabase and Save.
Important details:
- Authorized JavaScript origins: where requests originate. Example: your Lovable preview domain.
- Authorized redirect URI: where Google sends users back. Example: the Supabase callback URL.
- trailing slash: remove it to avoid errors in Google or Supabase.
What Lovable preview and Supabase URL settings finalize the login?
Social login won’t work inside the Lovable editor preview. Use your preview link, and set the correct Site URL in Supabase so redirects land in the right place.
Why doesn’t social login work in the Lovable editor preview?
- The in-editor preview currently fails for social login.
- Always test using the external preview link.
- Example: click the app’s preview button and copy the default URL.
Vocabulary in context:
- preview link: external URL where OAuth works. Example: open the preview and copy the URL.
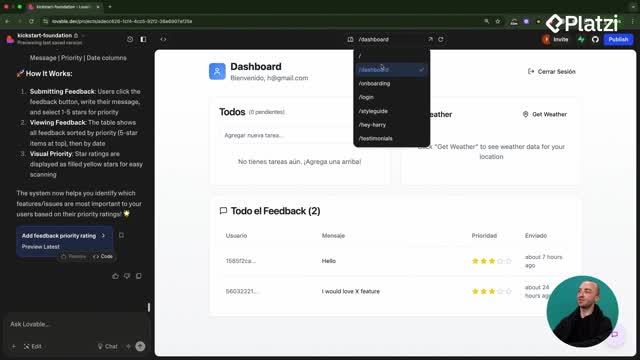
- Button label: Continue con Google.
How to set the site URL and test the flow?
- In Supabase → Authentication → URL configuration, set Site URL to your Lovable preview link (not localhost:3000).
- Optionally add the same link under “Add new redirect URLs.”
- Save changes.
- Test: open the preview link, refresh, click Continue con Google, choose your authorized Google account, accept the requested info, and you’ll be redirected back logged in.
Troubleshooting tips:
- If you see a failure after Google shows the app name, update Site URL in Supabase.
- If Google complains about URLs, remove https or trailing slashes where required.
- Edit your OAuth client in Google Cloud if you need to adjust origins/redirects.
Have a question or a tip that helped you get it working faster? Share it in the comments.