Adding role-based access in Lovable and Superbase lets you offer an admin experience with control over users and data. Here you’ll see how to define roles, secure them in the database, show admin-only UI, and enable admin CRUD on the profiles table using RLS.
How do you set up a role-based system in Lovable and Superbase?
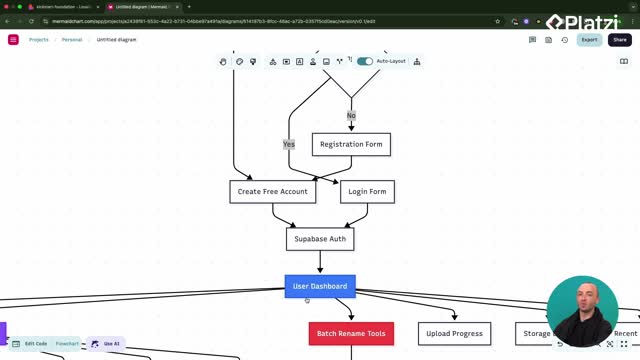
A clear structure ensures that only approved users gain extra permissions. The flow starts in Lovable by creating roles and approving the proposed database changes.
- Define two roles: admin and user.
- Set the default role to user for any new account.
- Create a secure user roles table linked to the user ID.
- Approve the Lovable prompts that add or replace database functions.
What structure should roles and users have?
- Use a dedicated roles table associated with each user ID.
- Ensure new users get a base role of user automatically.
- Keep role data readable but not editable by regular users.
Why use a separate roles table for security?
- Editing roles directly on the profile would let users change their own role.
- A secure roles table blocks unauthorized updates.
- Users can only read their role, preventing escalation by malicious updates.
How do you assign the admin role?
- Insert a new row in the roles table and select your user ID.
- Choose the admin role.
- Save the change to grant admin privileges.
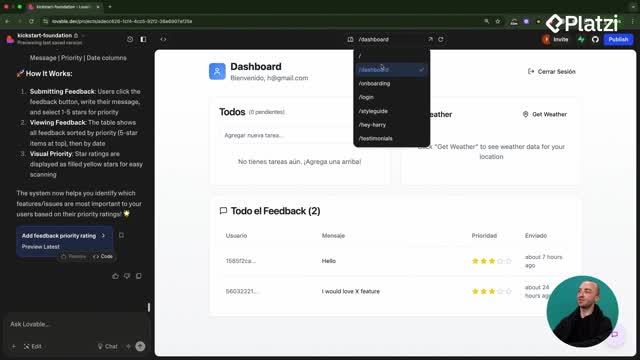
How do you show admin-only UI in the dashboard?
The UI should reflect the user’s role. In Lovable, add a button in the dashboard header that only admins can see and click to open the admin panel.
- Show an admin badge when the role is admin.
- Render an Admin button only for admins.
- Route the button to the newly added admin panel.
How can you test admin visibility?
- Switch your role from admin to user in the roles table.
- Refresh the deploy page and confirm the badge disappears.
- Verify the Admin button also disappears for non-admin users.
What happens when the role toggles back to admin?
- Change your role back to admin.
- The badge returns and the Admin button reappears.
- Clicking it opens a page listing all users.
How do admins get CRUD access to user data with RLS?
To load and manage user data in the admin panel, add RLS for admins on the profiles table, enabling create, read, update, delete.
- Ask Lovable to add RLS policies so admins can CRUD on profiles.
- Run the proposed database queries and confirm success.
- Check the admin panel: user data should now load correctly.
What admin actions are now possible?
- View all users in the admin panel.
- Update roles as needed to build your admin team.
- Extend the panel with stats, user data, and other admin tools.
Key concepts and skills highlighted:
- Role-based system: define admin and user roles, assign per user.
- Default role: new accounts start as user to restrict access by default.
- Secure roles table: prevents users from editing their own roles.
- Admin-only UI: badge and button controlled by role checks in the dashboard header.
- RLS (row-level security) on the profiles table: grants admins controlled CRUD.
- CRUD: create, read, update, delete on user data for admins.
What feature would you add next to your admin panel? Share ideas or questions and keep building.