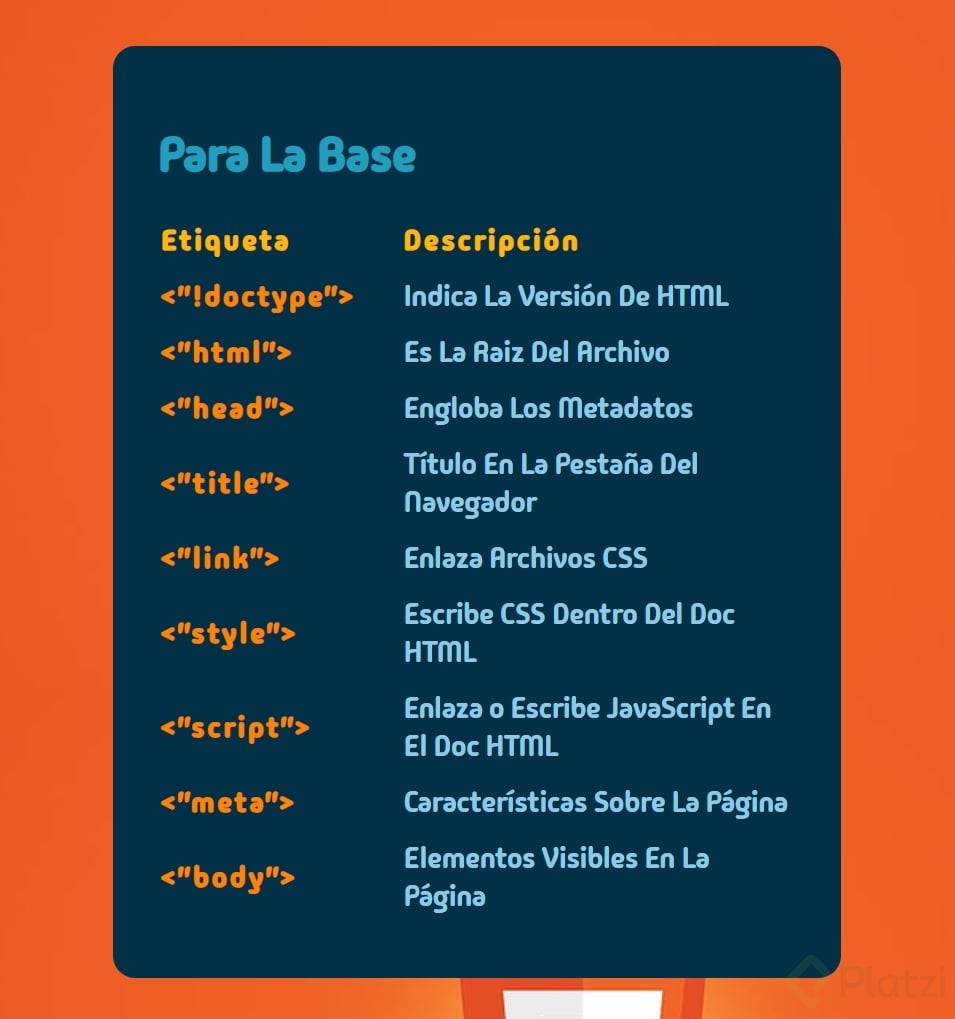
En El Diseño Web, Las Tarjetas Son Un Elemento Visual Clave Para Organizar Y Presentar Información De Manera Clara Y Atractiva. A Través Del Uso De Etiquetas HTML, Es Posible Estructurar Contenido Dentro De Tablas Para Crear Tarjetas Personalizadas Que Se Adapten A Diferentes Necesidades. En Este Artículo, Exploraremos Cómo Crear Tarjetas Utilizando Tablas En HTML, Explicando Cada Una De Las Etiquetas Clave Que Intervienen En El Proceso.
Paso 1:
Comenzaremos Creando Una Estructura Html Con “Div” De Contenedor y “Table” Como Contenido
<body>
    <div class="for-the-base">
        <h1 style="color: #219ebc;">Para La Base</h1>
        <table>
            <tr>
                <th class="label">Etiqueta</th>
                <th class="description">Descripción</th>
            </tr>
            <tr>
                <th><"!doctype"></th>
                <td>Indica La Versión De HTML</td>
            </tr>
            <tr>
                <th><"html"></th>
                <td>Es La Raiz Del Archivo</td>
            </tr>
            <tr>
                <th><"head"></th>
                <td>Engloba Los Metadatos</td>
            </tr>
            <tr>
                <th><"title"></th>
                <td>Título En La Pestaña Del Navegador</td>
            </tr>
            <tr>
                <th><"link"></th>
                <td>Enlaza Archivos CSS</td>
            </tr>
            <tr>
                <th><"style"></th>
                <td>Escribe CSS Dentro Del Doc HTML</td>
            </tr>
            <tr>
                <th><"script"></th>
                <td>Enlaza o Escribe JavaScript En El Doc HTML</td>
            </tr>
            <tr>
                <th><"meta"></th>
                <td>Características Sobre La Página</td>
            </tr>
            <tr>
                <th><"body"></th>
                <td>Elementos Visibles En La Página</td>
            </tr>
        </table>
    </div>
</body>
Paso 2:
Seguiremos Estilizando Los Elementos Del “Div” y Las “Tables”.
<style>
    @import url('https://fonts.googleapis.com/css2?family=Barlow:ital,wght@0,100;0,200;0,300;0,400;0,500;0,600;0,700;0,800;0,900;1,100;1,200;1,300;1,400;1,500;1,600;1,700;1,800;1,900&family=Fira+Sans:wght@400;500;600;700;800&family=Madimi+One&family=Salsa&display=swap');

    *{
        font-family: "Madimi One", sans-serif;
        box-sizing: border-box;
        padding: 0;
    }

    body{
        background-image: url(./img/FondoHTML.jpg);
    }

    .for-the-base{
        width: 70%;
        background-color: #023047;
        border-radius: 15px;
        padding: 30px;
        margin: 50px auto;
    }

    table tr .label, .description{
        color: #ffb703;
    }

    table tr .description{
        color: #ffb703;
        padding-left: 30px;
    }

    table tr th{
        color: #fb8500;
        letter-spacing: 2px;
        text-align: start;
    }

    table tr td{
        color: #8ecae6;
        text-align: start;
        padding-left: 30px;
    }

    table tr th, td{
        font-size: 19px;
        padding-bottom: 10px;
    }
</style>
Paso 3:
y Así Se Vería El Resultado, Gracias 😃

Curso de Frontend Developer
COMPARTE ESTE ARTÍCULO Y MUESTRA LO QUE APRENDISTE


